Run the samples
Two samples that together make one working integration: a Node backend and a minimal iOS app. Run the backend, then the app fetches session tokens from it and scans — exactly the shape of a real integration. Follow these in order.
Before you start
| You need | For |
|---|---|
| Xcode 16+ and an iPhone with Face ID | Real scans (the Simulator builds but can't scan) |
| Docker | Running the backend sample |
XcodeGen (brew install xcodegen) | Generating the iOS project |
| An app in the portal | Its keys — see step 1 |
1. Create an app and get its keys
In the portal, create one app and set its Bundle ID and Team ID to match the app you'll build (the sample's default bundle is com.example.VisualizeQuickstart — change it to your own). Copy both from Xcode's Signing & Capabilities.
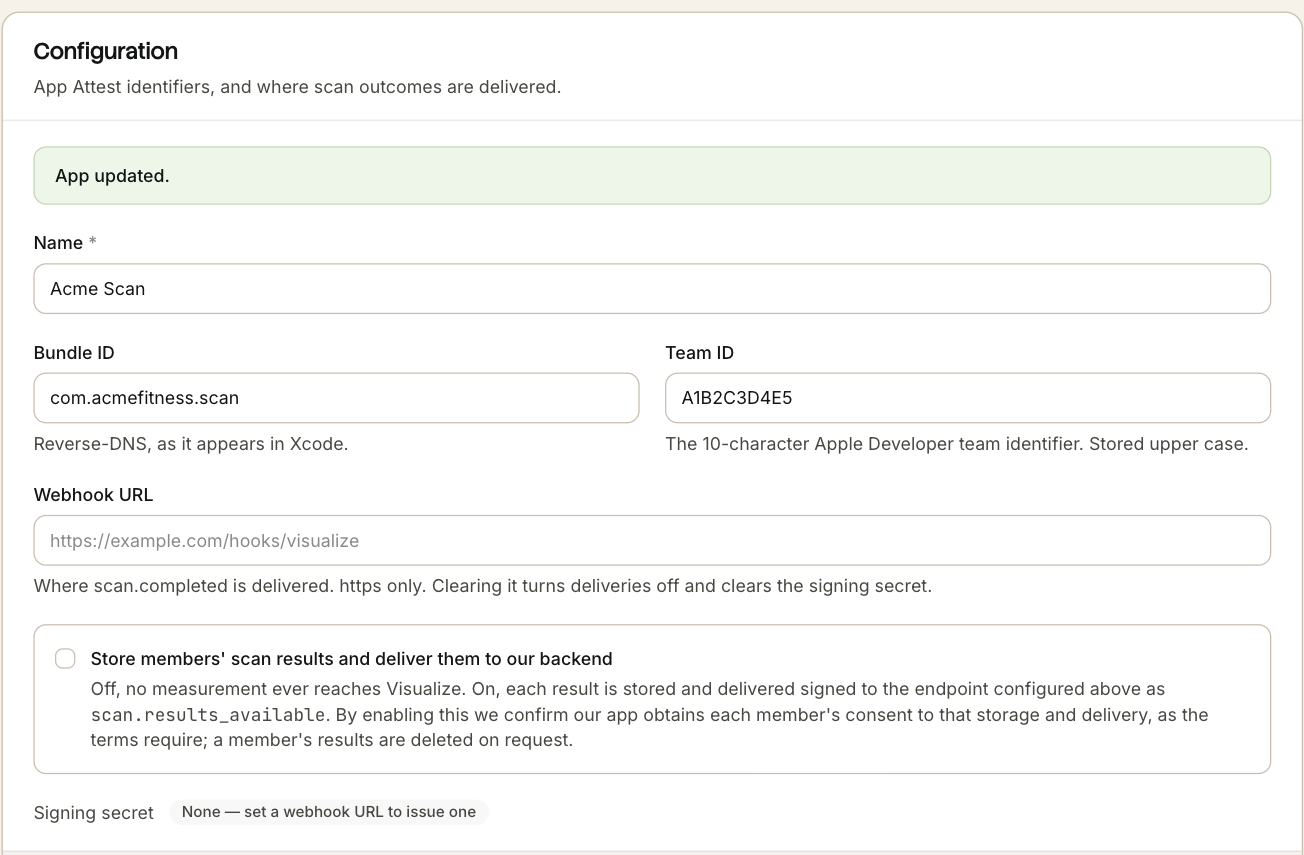
Finding them in Xcode: select your project in the navigator, choose the app target, and open the Signing & Capabilities tab.
- Bundle Identifier — the field on that tab (e.g.
com.acme.scan). Paste it into the portal's Bundle ID. - Team ID — pick your team from the
Teamdropdown, then read the 10-character ID from Xcode → Settings → Accounts (your team row), or from developer.apple.com → Membership. Paste it into the portal's Team ID.
Then issue a key. The publishable key pk_… ships in your app; the secret key sk_… stays on your server and is shown only once — copy it now.
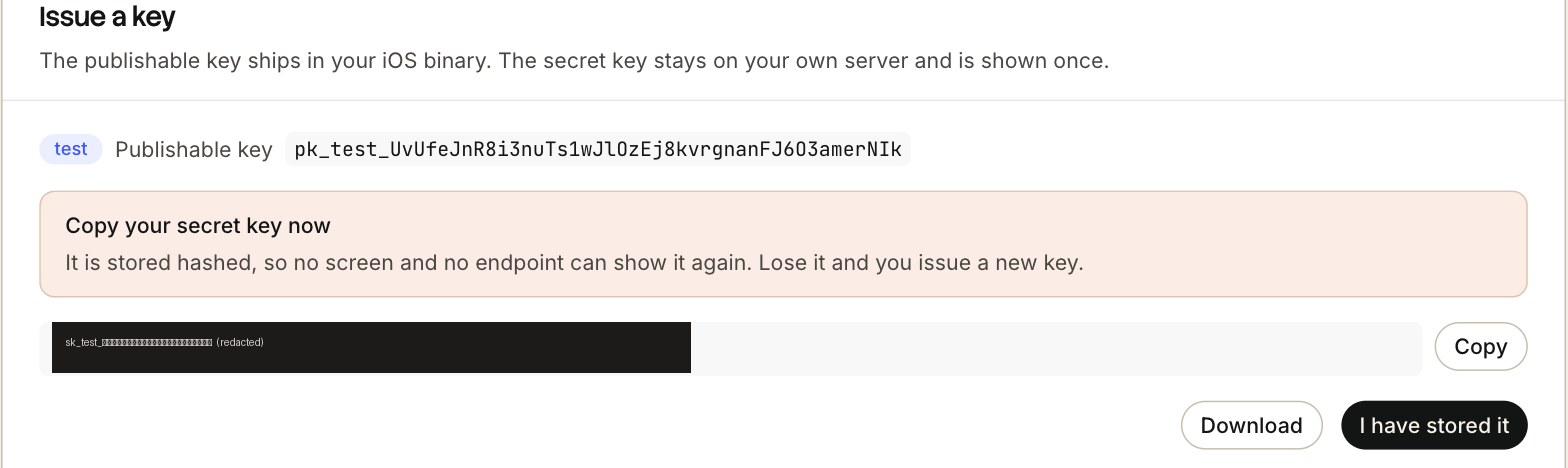
pk and sk must be the same app — otherwise scans fail with an attestation error. This is the most common setup mistake.2. Run the backend
In samples/backend-quickstart, copy the env file, put your secret key in it, and start:
cp .env.example .env
# edit .env:
#   VISUALIZE_SECRET_KEY=sk_...              your app's secret key
#   VISUALIZE_API=https://api.visualizeme.ai (or your onboarding base URL)
#   HOST_PORT=8080                            change if 8080 is taken
docker compose up
Check it answers:
curl -X POST http://localhost:8080/session
# {"session_token":"vst_...","expires_at":"..."}
3. Point the app at your backend
The iOS sample finds your backend through PartnerBackend.baseURL in Sources/PartnerBackend.swift. Set it to where your backend runs:
// Simulator + backend on your Mac:   http://localhost:8080
// Real iPhone + backend on your Mac:  http://<your-Mac-LAN-IP>:8080
// Deployed backend:                   https://api.yourcompany.com
static let baseURL = URL(string: "http://localhost:8080")!localhost is the phone, not your Mac — use your Mac's LAN IP (System Settings → Wi-Fi → Details), keep both on the same network, and match the port to the backend's HOST_PORT.4. Set your key, build, and run
In samples/ios-quickstart/project.yml, set VZPublishableKey to your pk_… and the bundle/team to match your portal app. Then generate the project and run it on your iPhone:
xcodegen
open VisualizeQuickstart.xcodeproj
# In Xcode: pick your iPhone, set your signing team, press Run.
Tap Body Scan. The model downloads once (progress shown), then capture runs and you get a result.
5. Receive results at your backend (optional)
By default results stay on the device. To also receive them server-side, enable results delivery and give Visualize a URL it can reach. Because deliveries come from the cloud, a local backend needs a tunnel:
ngrok http 8080          # prints https://<name>.ngrok-free.app
# no-account alternative: cloudflared tunnel --url http://localhost:8080
Then in the portal, on your app:
| Do | Value |
|---|---|
| Set the webhook URL | the tunnel URL + /webhooks/visualize |
| Copy the signing secret | into .env as VISUALIZE_WEBHOOK_SECRET, then docker compose up again |
| Turn on results delivery | the consent-worded switch |
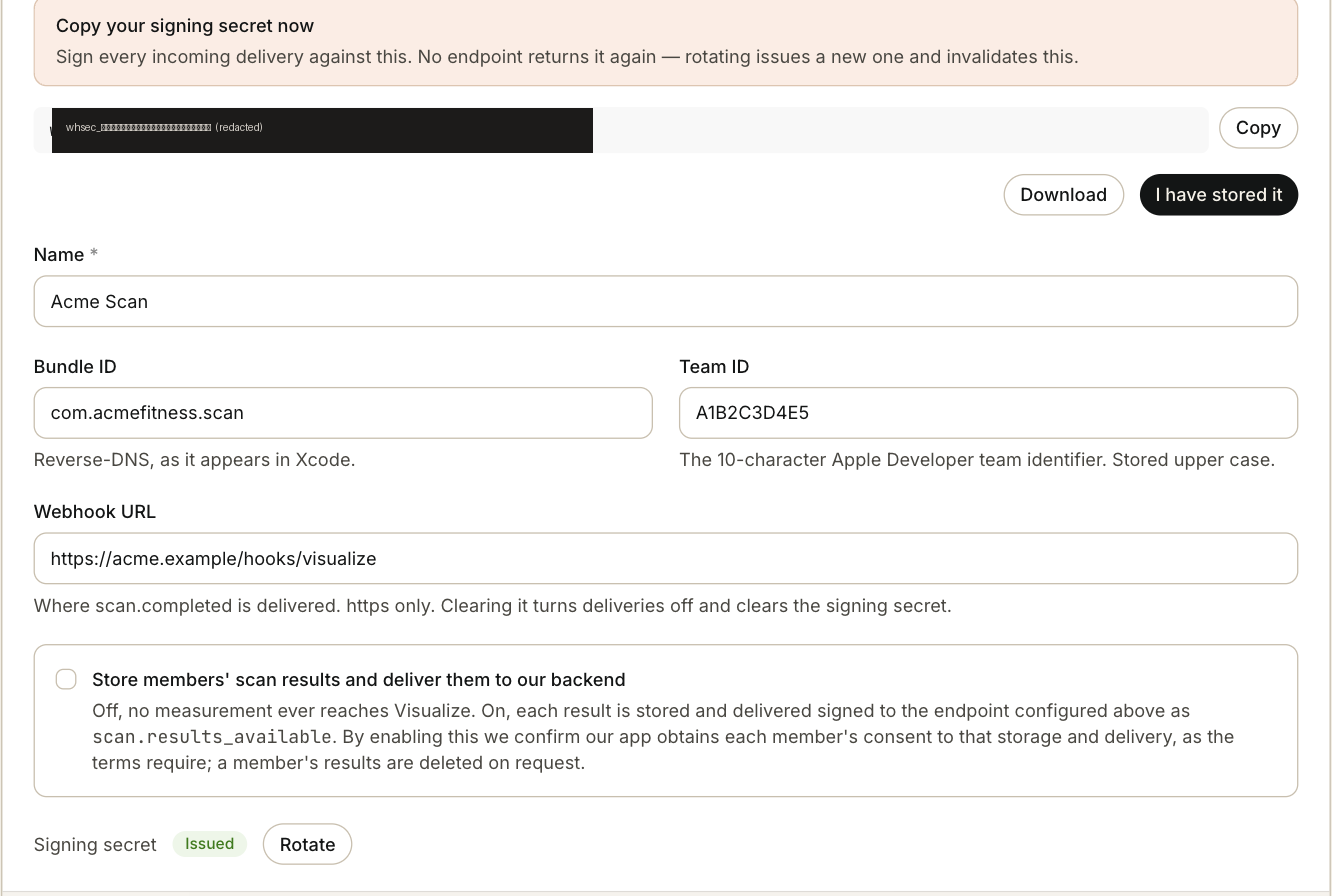
Watch a scan arrive:
docker compose logs -f
# scan.completed  scan_...  member ...
# scan.results_available  member ...:
# { ...the full result... }
Where to go next
The samples are the shortest path; the guides explain the pieces: Authentication, Scanning, Webhooks, and Results delivery.